26 June 2023
Laminating Tips and Tricks: Enhancing Durability and Presentation
Looking to enhance the durability and presentation of your printed materials? Laminating is a great solution. Our team at AfterPrint has put together some tips and tricks for choosing the right laminating machine, best practices for laminating, and even creative uses for this versatile technique. Read on to discover how lamination can elevate your printed projects.
Choosing the Right Laminating Machine
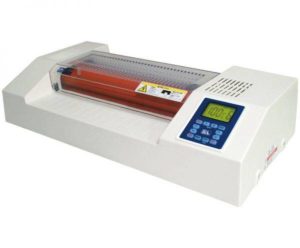
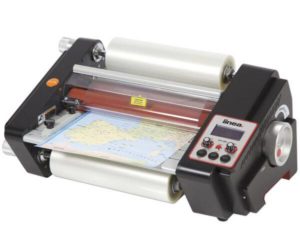
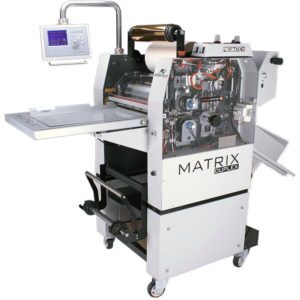
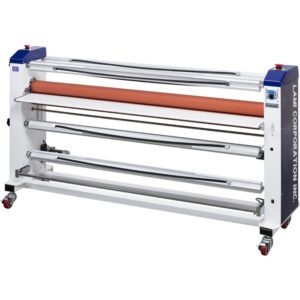
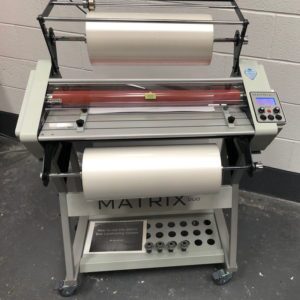
When choosing a laminating machine, it’s important to consider your needs. If you plan on laminating larger items such as posters or signs, you’ll want to choose a machine with a larger maximum width. On the other hand, if you primarily laminate smaller documents like ID cards or business cards, a smaller machine may be more suitable.
Another important factor when selecting a laminator is whether to use heat or cold lamination. Heat lamination is ideal for cardstock and thicker materials that require firm adhesion and straight edges. However, if you’re laminating documents with inkjet printed images or heat-sensitive materials like photographs, cool lamination might be the better choice for even coating without distortion.
Overall, by considering factors such as size requirements and material type when choosing your laminating machine type (heat vs cool), you can ensure that your finished product will look professional and last longer due to its added durability from being properly sealed in flat layers of laminate sheets.
Consider Your Needs
When deciding on the type of laminating machine to use, consider your specific needs. For instance, if you need to create durable and sturdy materials such as ID cards or menus, choose a laminate that can accommodate thicker cardstock and has an edge cutter for precise trimming. On the other hand, if you want a cool presentation for your graphics or artwork without compromising clarity and quality, select a flat-lamination method over hot lamination.
Additionally, think about whether you require even pressure distribution during lamination. If yes, go for machines with adjustable rollers that provide consistent pressure across different paper types. Lastly, if longevity is crucial in your line of work- such as references manuals or guidebooks- consider using laminate films like polyester that offer superior resistance against wear and tear compared to standard ones available in the market today.
Size Matters
Size matters when it comes to laminating. Choosing the right size for your project can make all the difference in achieving a polished and professional look. Be sure to select a size that allows for even edges and flat surfaces, while leaving enough space around the cardstock or paper to allow for cutting without damaging the laminate.
If you want your laminated materials to stand out from the rest, consider using cool edge technology. This innovative technique cuts through both layers of laminate at once, creating an even seal with no visible edges. Additionally, adding a glossy finish by choosing a high-quality laminate film can enhance durability and presentation of your documents or artwork.
Heat vs Cold Laminating
Heat laminating and cold laminating are two options available for those looking to protect or enhance documents. Heat lamination applies heat to the laminate, ensuring that it adheres evenly across the surface of the document. This process works best with items such as cardstock which can become flat and even after being exposed to heat. On the other hand, cold lamination uses pressure instead of heat, making it ideal for materials that cannot withstand high temperatures or cool surfaces.
When choosing between hot and cold laminating, consider your needs carefully. For example, if you need a quick turnaround time in your project and want an edge-to-edge coverage on large-format prints then a Heat Laminator would be appropriate while Cold Laminator is perfect for photos which you don’t want altered by heating them up too much during processing.
Overall, both methods have their benefits; choose based on what type of material you’re working with and how even you need the application to be!
Best Practices for Laminating
To ensure the best results when laminating, it’s important to properly prepare your document. This means removing any debris or dust particles before placing it into the machine. Additionally, trimming edges and corners can help prevent peeling over time.
One of the most common issues when laminating is the appearance of bubbles and wrinkles on the surface of your project. To avoid this, make sure to feed your document slowly and evenly through the machine while also applying light pressure with a flat object like a ruler or credit card. If you do notice bubbles starting to form during lamination, stop feeding immediately and use a pin or needle to gently prick them out from underneath before continuing.
Prepare Your Document
To ensure your laminated document looks its best and lasts longer, it is important to prepare it properly before using a laminating machine. Begin by trimming the edges of the document to create a clean and smooth edge. Next, remove any debris or dust from the surface of the document with a soft cloth or brush. Finally, make sure that your document is completely dry before laminating.
Any leftover debris or moisture on your documents can cause bubbles and wrinkles when you laminate them, which can ruin their appearance and durability. Preparing your documents properly will give them an attractive finish while also helping them last longer under normal wear and tear conditions. So take some time to prepare each item carefully before running it through your laminator for optimal results!
Avoid Bubbles and Wrinkles
When laminating documents, it’s important to avoid bubbles and wrinkles for a professional finish. One effective way to prevent this is by using a carrier sheet during lamination. This will keep the document flat and help distribute pressure evenly across it.
In addition, feeding the laminate slowly through the machine can also prevent air pockets from forming. Applying even pressure while feeding the laminate through will further ensure that bubbles and wrinkles are avoided. Taking these simple steps can enhance both durability and presentation of your laminated documents, ensuring they look their best for longer periods of time.
Proper Maintenance
Cooling down your laminator after use is an essential step in proper maintenance. This allows the machine to return to its normal temperature and prevents any damage to its components. Wiping down rollers with a soft cloth is also crucial in removing adhesive residue, which can build up over time and affect the quality of your laminations. Remember, regular cleaning ensures that your laminator functions properly.
In addition, storing your laminator in a clean, cool, and dry environment prolongs its life span. Moisture can cause rusting or corrosion on metal parts while dust accumulation can clog moving parts leading to malfunction during operation. By taking these simple measures seriously, you not only extend the durability of your device but also improve presentation by producing high-quality output consistently over time without needing repairs or replacements often.
Creative Uses for Laminating
Looking for creative ways to use laminating machines? Here are a few tips and tricks that can help you enhance durability and presentation. First, consider creating customized bookmarks for your business or personal use. Laminating them not only makes them more durable but also gives them a professional look that will impress others.
Another simple yet effective idea is to create DIY dry erase boards by laminating sheets of paper or cardstock. These boards can be used in various settings, such as classrooms, offices, or homes. Plus, they are reusable and easy to clean!
Last but not least, why not use laminators to preserve and display your artwork? This is especially helpful if you work with materials that tend to fade or deteriorate quickly over time. By sealing the artwork in lamination pouches, you can protect it from damage while still showcasing it beautifully on walls or shelves.
Customized Bookmarks
Create personalized bookmarks for gifts or personal use by following these simple steps. First, choose a design or image that you want to showcase on your bookmark. Second, print the design onto cardstock paper and laminate it using your laminating machine. Third, cut out the bookmark shape and add any additional embellishments like tassels or ribbons.
To make truly unique bookmarks, try laminating photos or artwork onto cardstock before cutting them out into shapes. This will not only increase durability but also enhance presentation.
Adding tassels, ribbons or other embellishments is an easy way to finish off your customized bookmarks with a touch of style and personality.
Customized Bookmark Tips:
- Choose high-quality images for best results
- Use thick cardstock paper for extra durability
- Experiment with different shapes and sizes
- Add textured elements like glitter or raised lettering
- Gift them along with books as thoughtful presents
DIY Dry Erase Boards
Turn any surface into a reusable dry erase board by laminating it with clear plastic. This simple DIY will save you money and is an excellent way to repurpose old materials. To add some fun to your design, use patterned paper under the plastic before laminating.
Here are some tips on how to make a DIY Dry Erase Board:
- Cut the laminated sheet into smaller sizes for easy portability
- Add magnets to the back of each piece, creating reusable to-do lists or notes that can be stuck onto magnetic surfaces.
Try this out and see how easy it is to create your own customised dry erase boards that are not only functional but also visually appealing!
Preserve and Display Artwork
Lamination is an excellent way to ensure the durability and presentation of items like artwork, recipes, and important documents. By using a laminating machine or service, you can protect your cherished possessions from wear and tear or damage caused by regular use or handling.
To make the most out of lamination, consider these tips:
- Laminate children’s artwork to preserve them from damage or wear and tear
- Display family recipes in your kitchen by laminating and hanging them on the wall
- Laminate important documents like certificates, diplomas, etc. for long-lasting protection
These simple steps will extend the lifespan of your precious items while adding a touch of personal flair to any space.

